Faded Shabby Blogs
03 February 2012
Repurposed Wreath
Well, I'm exaggerating here. One part of this wreath is repurposed: the base. With the "holidays" behind us, I've returned to the concept that I should be cleaning and organizing, opening and emptying boxes. Doing so has turned up quite a bit more packing paper the movers used to protect our items. I was trying to put some aside when I noticed that with a bit of turning, it took on this shape:
Obviously, it wasn't going to stay that way on its own. Where was that colored duck tape I used to mark all our rooms? It's in the garage, in a reusable shopping bag. It was unable to be found in a timely fashion, but while looking, I found another inexpensive adhesive (significantly less expensive, indeed, and I believe quite suited to the task) and used it. That adhesive is:
masking tape! I suppose you would have figured that out without the product placement. 3M-Scotch can thank me later. I tore off smallish pieces and wrapped my rough paper heart. I needed a somewhat sturdy base but didn't want to go spend money on this. (I'm certain my husband would argue that the consumables that we actually purchase, like adhesive, cost us enough money. But I had a vision! And a purpose: to repurpose items already in the house!)
There's a slight cheat to this mentality. I had some red paper, even some pink paper. But not enough of either. I was already placing an order to be shipped; I added a pack of the Light Red & Pink Shade Pack card stock (with Tulip, Hollyhock and Blush papers, so beautifully coordinated!) to the tune of $7.95. But I only used 3 sheets of each (the pack comes with four sheets of each), so I'm really only out $6 retail (and I get a discount). Suffice it to say, a foam wreath probably cost more than this AND I would have had to buy paper anyway. AND to buy the heart already made, well...that would be silly! Because I could make it!
I used my fantastic Cricut Art Philosophy cartridge to cut the 3D flowers. I set my dial to 2.75" and used the Auto Fill feature; 16 flowers were cut (with very little waste) on each sheet. Here's what the cutting mat looked like after a sheet was done:
My photography skills need improvement, I know. But I'm just trying to make sure you have some visuals peppered between my wordy paragraphs! Here are some of the cut flowers, as they look when peeled off above cutting mat:
You need to curl them up. This time I decided to use a glue gun (gasp) rather than Liquid Glass. I thought it would set a little faster (and I have an entire package of glue sticks just waiting to be used up...all this feeds my Use It Up Challenge too!). I got my rhythm perfected; I could roll a flower and have it glued and set in about one minute. When those minutes would have been spent just prowling Pinterest for a project or sitting down for some mommy screen time, I feel they were well worth it! (I may have been faster than that. I just know I had a certain amount of time before I had to fetch Mr. V from school and the number of flowers I assembled was about equal to the minutes.)
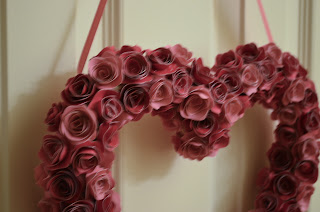
I also used the glue gun to adhere the flowers onto my wreath base. Here's the wreath in progress; I just love how the trio of colors offered interest. (BTW: I'm not really skilled with the photo editing program on this computer; I don't know that any of my photos show a true color for these three. Tulip has long been in my top 5 colors from CTMH; there is a hint of blue in this which makes me think Valentines whereas the Cranberry has a touch of orange and makes me think Christmas. Hollyhock is un-pink enough that I like it well. Ms. V adored the Blush, because that's "really pink" in her book. And pink still rules with my little princess.)
I debated how to affix a ribbon for hanging. Just put a loop on the back? Should I have adhered ribbon around the base before I put flowers on? I'm certain that I could have gone any number of ways. I decided to make my hanging options many and varied and went with a simple strand of grosgrain glued to the back of the heart, like so:
Yeah...it's a little blurry. And it's another completely different set of options for the colors. And perhaps you will notice that my flowers sometimes show gaps. I'm hoping that people coming over don't have to wait so long outside as to dissect this attempt at some holiday decoration on the front door. I just hope to offer a little inspiration. Maybe they'll ask me to show them how! That would be fun!
Subscribe to:
Post Comments (Atom)


No comments:
Post a Comment